


Snowflakes are our favorite thing about the winter season. They are beautiful and all unique. Just like each child in the world.
Shopping cart
Your cart is empty
Shop formulas
Favorites
You have not added any favorites yet.
Shop formulas
Christmas Crafts for Babies
It's that time of year again, but this year is different with baby's first Christmas. So how do you create great lasting memories and baby Christmas gifts? With baby's first Christmas crafts, of course!
Our team of moms spent some quality time with their little ones on these amazing Christmas craft ideas for babies. Plus, you can even use these ideas as Christmas crafts for toddlers. And as an added bonus, one mom even made Christmas food for babies - a Christmas teething biscuit.
We hope you enjoy making all these Christmas craft ideas for toddlers and babies. But even more so, enjoy that quality time and memories you make with your babies and family.
Table of Contents:
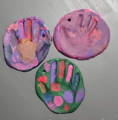
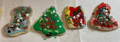
#1 Salt Dough Ornaments
I have seen plenty of these different ideas across the internet and this year I decided to make my own set of Christmas salt dough ornaments. To make it even better, I teamed up with one of my mom friends and all the kids made their own versions of the ornaments.
This year we even decided these will make amazing gifts for the grandparents - so they can decorate their own trees and feel close to the grandkids, even if we are far away. We hope you have as much fun making these as we did!
Supplies Needed:
- 1 cup salt
- 2 cups flour
- 1 cup water
- Paint (whichever colors you want! For the Santa ornament you need white, red, black, and skin-tone of your choosing)
- Paintbrushes of varied thickness - super thick ones work well for big areas and thin for the details
Instructions
Step One:
Combine the salt and flour, mixing the water slowly in. We didn't have any regular salt, so we used kosher salt; it works fine, just giving the dough a slightly different texture. Kneed dough until smooth.
Step Two:
Roll the dough out into 1/2" thickness. If you don't own a roller, be creative - we used a cylinder glass and it worked just fine!
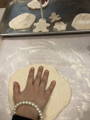
Step Three:
Create handprints in the dough. If you want, you can use cookie cutters as well and make whatever shaped ornaments you would like. We cut around the handprints, that way we could reuse the dough and roll it back out for more shapes.
Step Four:
Poke a hole into the ornaments - wherever you want the string to hang from. We used a straw to poke the hole, but you can use a toothpick for a smaller hole. Then place them in the oven at 200° F for 3 or more hours, until they are completely dried.
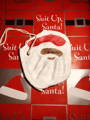
Step Five:
Once they have cooled down, you are ready to paint. Depending on the age of your kiddo, you can either let them create their own masterpiece or create one for them. The friend's kids went wild with paint, while we created little Santa gifts. Just a tip, if you want to make Santa you can paint it all white for a background, let it dry, then paint over the details.
Here are some pictures of the progress:
Step Six:
Let them dry! If you paint the front and back it will take longer to dry. We liked painting the back for extra character. When they are fully dried, you can coat it with lacquer. Tie the string through and don't forget to write your kiddo's name on the back as well as the year in permanent marker! Lastly, admire your beautiful art piece.
We hope you enjoy making these like we did. They were messy, so make sure the kiddos are in clothes that are okay to get painted!
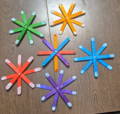
#2 Snowflake Popsicle Stick Ornaments
What you will need:
- Hot glue and hot glue gun or craft glue
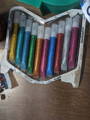
- Glitter glue (Hobby Lobby) or regular glitter
- Self- adhesive Gem stones (Hobby Lobby), or other kinds of little decorations
- Ribbon
- White acyclic paint
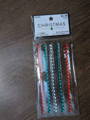
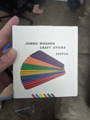
- Colored popsicle sticks (from Amazon) or regular ones that you can paint with acyclic paint.
- To make each snowflake you need 4 Popsicle sticks. If your popsicles sticks are not preprinted, then I recommend painting them and letting them dry before starting step 1.
Instructions
Step 1:
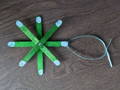
Using either hot glue or craft glue, take your first two Popsicle sticks and glue them together to form a crisscross. The take your next two popsicle sticks and glue them together to form an X. Glue the crisscross and the X together to get the snowflake shape. If using craft glue make sure to let the snowflake dry before moving to step 2.
Step 2:
Once you have your Popsicle sticks in a snowflake shape, use glitter glue and a paint brush to cover the sticks in glitter. If you are using regular glue and glitter, use a paint brush to spread the glue evenly on the sticks, then sprinkle on the glitter. Let the snowflakes dry.
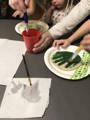
Step 3:
Once the snowflakes are dry, you can start adding decorations. I had put white acyclic paint on my toddler’s and baby’s fingers to create finger print snow on the ends of the Popsicle sticks.
You can also add gem stones or any other small decoration to make each snowflake unique to you and your family.
Step 4:
Take a piece of ribbon about 8 to 10 inches long. Fold it in half to form a loop and glue the ribbon to the back of the snowflake.
This is such a fun and easy craft project. You will create lot of amazing memories with your children while making Popsicle stick snowflake ornaments!
They also make amazing gifts for family and friends.
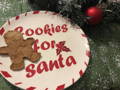
#3 Christmas Cookies
What you will need:
- 1 ½ cups butter, soften
- 2 cups white sugar
- 4 eggs
- 1 teaspoon vanilla extract
- 5 cups all-purpose flour
- 2 teaspoons baking powder
- 1 teaspoon salt
Instructions
Step 1:
In a large bowl, cream together butter and sugar until smooth. Beat in eggs and vanilla. Stir in the flour, baking powder, and salt. Cover, and chill dough for at least one hour (or overnight).
Step 2:
Preheat oven to 400 degrees F (200 degrees C). Roll out dough on floured surface 1/4 to 1/2 inch thick. Cut into your favorite shapes with any cookie cutter. Place cookies 1 inch apart on un-greased cookie sheets.
Step 3:
Bake 6 to 8 minutes in preheated oven. Cool completely.
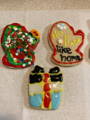
Step 4:
Decorate. We used pre-made frosting in a piping bag. We also used sprinkles. You can use frosting or icing to decorate your Christmas cookie.
Baking with your children is a great way to teach them a new skill. It is a great time to make new memories that will last a life time. This is also the perfect treat for your little one to enjoy with the perfectly madebottle of OrganicEuropean Baby Formula!

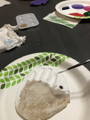
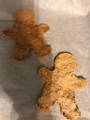
#4 Christmas Teething Biscuits
No matter how you celebrate baking is an important part of the magic that is the holidays. Every year our family enjoys making special treats for our family and friends.
During the special times when we have a baby old enough to sit up in the house, we pull out our tried and true organic and healthy teething biscuit recipe and put a Christmas spin on it.
We love the updated version of this recipe because it is gluten-free and vegan friendly. Enjoy!
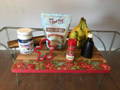
Ingredients
- 2 cups of steel cut oats
- 1 large very ripe banana
- 3 tablespoons coconut oil
Optional
- 1 teaspoon organic vanilla
- ¼ teaspoons cinnamon
- other family favorite spices to taste
babies of 12 months might enjoy ¼ tsp of local honey
Instructions
Preheat oven to 350 degrees. Prepare a baking sheet with parchment paper or a silicone baking mat.
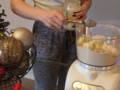
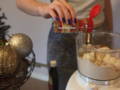
In a food processor, blend the oats into a very fine powder
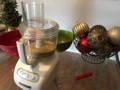
Add banana and coconut oil and any vanilla or spices you may be using to the food processor and mix until it comes together in a dough.
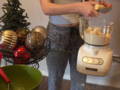
If the dough is very sticky to handle, you can dust more oat powder onto the exterior of the ball to make it easier to handle. If the dough is too dry, you can add a little coconut oil or applesauce to moisten.
Divide the dough into 10 balls. Pat out each ball into the cookie cutter shape about 1/4 inch thick.
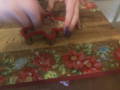
Place evenly on a baking sheet so that none of the biscuits are touching.
Bake at 350 degrees for 10 minutes.
Flip and cook for another 5-10 minutes, or until the edges are golden and the centers are set and crunchy.
Allow to cool completely. Store in an airtight container at room temperature, in the refrigerator, or the freezer.
Mom Note:
These biscuits are soft and crumbly so keep your little close by when sharing this yummy holiday treat.
Conclusion
Whether you are wanting to do Christmas crafts for babies or bake some yummy Christmas treats, anything that you do with your children is creating life-long memories.
Family is so important, especially during this time of the year; so make the most of it and enjoy some creative ideas from us here at My Organic Company.
Happy Holidays from our families to yours!
Read Next:

European Baby Formula Stages: The Ultimate Guide Written by Renee Published on 10/04/24 Read Time 13 min European baby formulas have...

Kendamil VS HiPP: The Ultimate Parent's Guide Written by Renee Published on 08/09/24 Read Time 15 min As more parents resolve...

HiPP Dutch Organic Goat Milk Formula: Ultimate Guide Written by Renee Published on 07/30/24 Read Time 12 min The key to...